Thursday, February 20, 2014

#12 Dry Cider - Tasting

Recipe     -     Tasting

I've been good, I've been patient.  It's now been a month and a half since we bottled the cider and 4 months since fermentation began.  We gave this cider all the time it needed, haven't popped a bottle early, and let me tell you, we've been rewarded.  Both the ale and wine yeast variants taste fantastic, and I couldn't be happier with how they turned out.

Ale Yeast (labeled Ca):
This is a beer drinker's cider.  It's extremely dry, but with a round, reserved apple character.  The yeast seems to have stripped some of the apple character--especially from the aroma, which is nearly nonexistent--and augmented it with subtle esters that, while they don't overtly remind me of beer, are certainly familiar.  A faint yeastiness (as in the smell of yeast itself, rather than esters) creeps in towards the end of the glass.

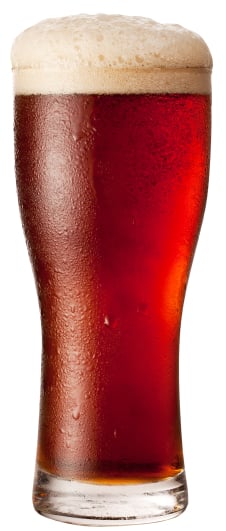
Wine Yeast (labeled Cw):
Just opening the bottle reveals how big a difference the yeast strains makes.  This version has a beautiful apple aroma, with granny smith most prominent.  The flavor is sharper than the ale version, very clean with none of the yeast flavors.  The carbonation is only barely noticeable, but the bright character is somewhat reminiscent of champagne.  While the alcohol harshness I tasted at bottling has subsided, this is still clearly a stiff drink, and I suspect it will only get better with age.

Overall I would have to say I prefer the wine yeast here, but it definitely depends on how it's used.  The crisp flavor and wonderful aroma go well with this extremely dry recipe, but the alcohol flavor is more prominent.  I think the ale yeast would go better in a semi-dry cider where there's a bit more body and apple flavor to compliment the yeast derived esters, or maybe in a hopped cider as well.

It seems like cider would be interesting to pair with food, but I'm not familiar with any traditional pairings.  A white fish or maybe oysters?  Pork?  I have some experimenting to do.  Please leave a comment below if you have a suggestion, and we can give it a shot!

Sunday, February 16, 2014

#19 Irish Red Ale - Brewday

Recipe     -     Brewday     -     Tasting

Brewday 2/15/14:
It's always a relief when things go as planned, and today was one of those few instances.  I had to run a few errands before I could start brewing, and after yesterday's dry stout had so many mishaps I seriously considered just sleeping in and bagging the whole thing.  Thankfully I didn't.

Step one was to find parts to repair the immersion chiller, pickup some propane, and find some new brewing water.  Lately I've been using Seattle municipal water because it's unusually soft and I found a water report online that tells me exactly what I'm working with (I switched over from using well water because it's nearly undrinkable).  However this means I have to lug two plastic carboys back and forth between my brewing operations at the family "estate" and my apartment in the city.  It also means after brewing yesterday, I have nothing left.  As it turns out, Home Depot had everything I needed including some distilled water, but that meant I had to rework the water profile a bit.


After that things were uneventful.  I made sure to setup shop undercover so I wouldn't get drenched again.  Mash temps weren't perfect, but as close as can be hoped for with brew-in-a-bag.  I'm going to have to attribute some of the success to the Smithwick's I was drinking for inspiration (I have to admit I wasn't a fan, so hopefully mine turns out better).  Compared to yesterday, there's not a whole lot to report, so I'll just throw in more pictures.


Actually, there was one change that I forgot to mention yesterday.  It seems that the homebrew shop where I get my supplies has tightened their mill, so the grain I bought for the dry stout and this Irish red had a noticeably finer crush.  This makes the starches in the barley kernel more accessible to the mash water, increasing starch solubility and conversion.  The finer crush can also tear the husks in to smaller pieces which, in traditional mashing, can make lautering more difficult, but with brew-in-a-bag that's not an issue.  Moral of the story, I had much higher efficiency in these two beers, jumping from 55% brewhouse efficiency up to 65% which was nice, and definitely within the limits of the style.  After the mash, I had a bit more boil off than expected, so the final volume came out at 4.75 gal.  It wasn't off much, but between the high gravity and the already high hops (30 IBU), I decided to add a bit of top up water, bringing the volume to 5.25 gal.


Fermentation:
Decanted and pitched the second of the Irish yeast starters (see dry stout notes for starter information) at 55F.  Placed in fermentation refrigerator with temperature set to 65F.

After 2 days, things are bubbling along nicely.  Temp bumped up to 68F to ensure it finishes strong.

Kegged at two weeks.  Tastes pretty good already, can't wait to try it carbonated!  It's a little bit darker than I hoped but as long as it tastes good that's all that really matters.


Saturday, February 15, 2014

#18 Dry Irish Stout - Brewday

Recipe     -     Brewday     -     Tasting

Yeast Starter:
Lately I've just been using a single package of yeast for some of my beers since they've been somewhat small.  However, the amount of yeast in a single package is usually lower than the recommended cell count for a 5 gal batch of most beers.  Since I'll be using the same yeast (Wyeast 1084 Irish Ale) for this stout and the Irish red ale, I was able to make two yeast starters from the same package of yeast.  I boiled the extract, 2/3 lb in 2/3 gal of water, chilled the pot in the sink, gave it a 20 second shot of pure oxygen, then added the yeast and 1/2 a tsp of yeast nutrient.  This mixture got split evenly into two glass containers so I could pour the evenly split cultures into their respective batches.  The yeast seemed to work quickly, finishing fermentation and flocculating in only 4 days.  I gave them the rest of the week in the refrigerator to help settle out the remaining cells so I could decant the liquid off the top and only add the yeast itself to the beer on brewday.

Water Adjustments:
On the last beer, I added calcium carbonate (chalk) to bump up the alkalinity, but I've been reading Water by Palmer and Kaminski, where they discourage the practice.  Apparently it will not dissolve sufficiently on its own (see Kai Troester's write up for an idea of what it takes) to provide consistent results.  Instead they recommend sodium bicarbonate (baking soda) which is also readily available, though it contributes sodium ions instead of calcium which I have to make up elsewhere.  Calcium performs a variety of roles in the mash, boil, and fermentation to promote clarity and stability in the finished product.  I will compensate with additions of calcium sulfate and calcium chloride in order to maintain the roughly 2:1 sulfate to chloride ratio of the Dublin water.

Brewday 2/15/13:
Well the first thing to go wrong was the mash tun.  I had hoped to make this the first batch mashed in the rectangular cooler mash tun I bought as part of the system, but not only was I missing a couple pieces of the manifold, it doesn't even hold water.  I had filled it with an OxiClean earlier in the week to get it nice and clean, but the solution ran out all over the floor of the garage.

I ended up just doing another batch using the same brew-in-a-bag (BIAB) process I've been using since I graduated to all-grain.  Instead of using a separate mash tun to steep the grain, the mash happens right in the boil kettle.  While it has its strengths and you can make solid beer with this method, it also has a few weaknesses vs traditional mashing methods:
  • Low Efficiency: Efficiency is the percentage of available sugars extracted from the grain.  Without a proper sparge (rinse), BIAB tends to result require more grain to brew the same beer.
  • Poor Wort Clarity: Anything that can sink through the holes in the grain bag remains in the brew kettle, including proteins and small grain bits.  The grain bed usually filters these out in a mash tun.  
  • Increased Dead Space:  My boil kettle has a false bottom, meaning there is nearly a gallon of wort that is not in direct contact with the grain.  While this isn't a huge issue, it makes it difficult to compare the thickness of the mash (ratio of water to grain) to values in recipes and brewing literature.  Mash thickness is one of the factors affecting the amylase enzymes.
  • Temperature Control: Unlike an insulated mash tun, the boil kettle is susceptible to wider temperature swings.  This makes it difficult to hit mash temps and to reproduce exact mash conditions from batch to batch.
That last one really bit me today.  The target mash temp was 150F, but I started off a hair low, and it quickly dropped to 145F.  I turned on the burner to bump it back on target, but I got distracted with my new pH meter (more on this later) and after 15 minutes realized I had way overshot my temps.  I cut the gas, but after the kettle finished conducting heat to the mash, the temperature was all the way up to 170F.

What did this do to the mash? Well only time will tell.  And in the mean time all I can do is speculate ... so I will.  I had a good 10-15 minutes in the upper 140's which is prime territory for β-amylase, so I'm thinking there should be a good amount of fermentable sugars in the wort.  After that the temperature slowly rose through the 50's, kicking α-amylase into gear.  The enzymes work more quickly at higher temperatures, but they can denature if the temperature gets too high: 149F for α-amylase, and 176F for β-amylase.  It's tough to tell what portion of the 
β-amylase denatured before the mash eventually cooled back into the 150's, but based on the foaming I usually see during the hot break and the couple isolated pockets of foam here, I would guess less than half.  I performed an iodine test to check for complete starch conversion, and that came out pretty clean so I proceeded with my modified sparge as normal.  The final temperature profile looks similar to the German Hochkurz mash, so based on some reading there, I would guess this would be a moderately fermentable wort ... hopefully roughly where I intended in the first place, but probably a bit thicker.

As I mentioned earlier, I got distracted because I was calibrating my new pH meter!  Whatever I put on my Christmas list, Santa seems to deliver whether or not he knows why I want it, and this time he really delivered!  It's accurate down to +/- .02 pH, unlike those test strips which are accurate to +/- is it wet?  The pH at the end of the mash was about 5.4, dead center of the optimum range, so it was a relief to see something go right.  All the studying I've done on water and mash chemistry, finding good water and adding specific minerals, actually worked as expected.

For me, the mash is generally the most stressful part of the process: I [should] hover over the kettle, checking temperature while still trying to prepare things for the subsequent steps like cleaning and measuring hop additions.  However, even after the hard work was complete things found a way to go wrong.  Mother Nature came and rained on my parade.  Then at the end of the boil, the hose fitting on the immersion chiller sprang a leak, so I had to stand in the rain as the beer chilled (20 min.), holding the leak closed with one hand while shielding the pot with a makeshift lid with the other.  I got soaked.  I don't think too much water got into the beer, so infection shouldn't be a big issue, but I would always rather have no question.  And a dry shirt.


Fermentation:
Pure O2 for 30 sec., yeast slurry pitched from decanted starter at 65F.  Carboy placed in fridge set to 63F.

After only 24 hr, the yeast has already kicked things into high gear.  I learned my lesson on the imperial stout a couple months ago--always use a blowoff tube--and it definitely got used here.  Irish red added to fermentation fridge and temperature set to 65F.

At 3 days, fermentation appears to be nearly complete.  I bumped the temperature up to 68F as usual to make sure the yeast finishes and cleans everything up before going dormant.

Thursday, February 13, 2014

#19 Irish Red Ale - Recipe

Recipe     -     Brewday     -     Tasting

Believe it or not, there is more than one beer in Ireland.  Besides dry stout, the other style to originate in the country is Irish red ale.  Sorta.  Depending on who you ask it's either a remarkably balanced and sessionable ale or a bland off shoot of English ale.  As Ron Pattinson writes, Irish ale (just like porter) started out as a copy of it's English cousin, with local producers cropping up to meet the demand filled by English imports.  What has since been defined as the "Irish red ale" style was probably first described--like most style distinctions--by Michael Jackson (the beer hunter not the pop star) to describe George Killian Lett's beer from Enniscorthy, County Wexford, Ireland.  The brewery didn't last much past Jackson's visit, and now the most widespread ales of Ireland are Smithwick's (arguably more similar to an English bitter) and Kilkenny (an especially bland cream ale).


The style remembered from Jackson's writing remains most strongly (and tenuously at that) in the minds of American beer drinkers, if not in their mouths.  The only examples I've had here are Killian's Irish Red and Karl Strauss Red Trolley.  I'll spare you the details of how Coors has bastardized the Killian's brand, so suffice it to say I prefer Red Trolley, but it has been almost three years since I last tasted it.

Anyway, since I don't have any of these beers here in Seattle, more important for me is how I imagine the style in my own mind.  I imagine it as a medium bodied, fairly creamy, malt-forward ale with the dominant flavors being caramel and especially toffee, but in a dry way.  This is not to be confused with the more popular American red ales and imperial reds, which have more in common with amber ales and double IPAs respectively.  Listening to an episode of Brewing with Style, Jamil Zainasheff described exactly the kind of beer I seek to create, so I ended up using his recipe.  Unfortunately, the local homebrew store only had roast barley in 500L instead of 350L as the recipe calls for, so I cut the amount in half.


Irish Red Ale
--------------------------
Batch Size (fermenter): 5.00 gal
Estimated ABV: 5.0 %
Estimated OG: 1.049 SG
Estimated FG: 1.011 SG
Estimated Color: 15.6 SRM
Estimated IBU: 31.9 IBUs
Brewhouse Efficiency: 60.00 %
Est Mash Efficiency: 69.0 %
Boil Time: 60 Minutes

Ingredients:
------------
Amt           Name                                     %/IBU         
8 lbs 9.6 oz  Pale Malt, Maris Otter (3.0 SRM)         78.7 %
1 lbs 6.4 oz  Pale Malt (2 Row) US (2.0 SRM)           12.8 %
6.0 oz        Caramel/Crystal Malt - 40L (40.0 SRM)    3.4 %
6.0 oz        Caramel/Crystal Malt - 120L (120.0 SRM)  3.4 %
2.8 oz        Roasted Barley (500.0 SRM)               1.6 %
1.55 oz       Goldings, East Kent [6.30 %] - Boil 60.0 31.9 IBU
0.25 tsp      Irish Moss (Boil 10.0 mins)              -
1.0 pkg       Irish Ale (Wyeast Labs #1084)            -

Mash Schedule: BIAB, 150F
Total Grain Weight: 10 lbs 14.8 oz
Estimated Cost: $22.37

Tuesday, February 11, 2014

#18 Dry Irish Stout - Recipe

Recipe     -     Brewday     -     Tasting

It's now about a month until St. Patrick's Day which can only mean one thing: time to brew an Irish stout.  (Okay, I lied.  It could also mean brewing an Irish red ale, but I'll get to that tomorrow.)  Everybody knows St. Patty's means shamrocks and Guinness... and I really don't see any reason for this to change, let's do it!


As the most famous stout worldwide (as of the latter half of the 20th century), I guess Guinness has earned it's own category, and that category is known as dry stout or Irish stout.  Despite the jet black color and creamy texture, Irish stout is a much smaller brew than it appears at only 4%-5% ABV and 1.007-1.011 FG.  While most beers rely on dextrins (unfermented oligosaccharides, not to be confused with dextrose) to add viscosity, Irish stout is fermented dry and instead uses a generous portion of flaked barley.  Flaked barley--like flaked oats--contains high levels of longer carbohydrates called β-glucans which are normally destroyed during the malting process and contribute body without the sweetness.

The recipe I plan to brew will be fairly straightforward.  However, as always, there are things I'm trying to learn along the way.  On the last beer, I took my first stab at building a water profile.  I'm going to chalk that one up as a success since I didn't notice anything wrong with the beer, but there was not too much to go wrong; the profile I went with for a mild was pretty ... mild, with no high concentrations of any mineral, and a naturally balanced pH.  This stout on the other hand will have an entire pound of roast barley, which contributes to higher acidity.  To keep a balanced mash pH, the brewing water for a dry stout must be significantly more alkaline than the water for say a wheat beer or IPA.  You can see on this chart the difference between Seattle water and Dublin water (bicarbonate, listed at right, is the principle component of alkalinity at normal water pH).  The difference is stark, if misleading.  I'm clearly not the first to manipulate brewing water, and the brewing water used in Dublin is likely significantly softer than the report indicates.  I will have to add minerals to balance the pH, but just not to that degree.


Dry Irish Stout
--------------------------
Batch Size (fermenter): 5.00 gal
Estimated ABV: 4.6 %
Estimated OG: 1.045 SG
Estimated FG: 1.010 SG
Estimated Color: 32.9 SRM
Estimated IBU: 47.6 IBUs
Brewhouse Efficiency: 60.00 %
Est Mash Efficiency: 69.0 %
Boil Time: 60 Minutes

Ingredients:
------------
Amt          Name                                     %/IBU
8 lbs        Pale Malt (2 Row) UK (2.5 SRM)           72.7 %
2 lbs        Barley, Flaked (1.7 SRM)                 18.2 %
1 lbs        Black Barley (Stout) (500.0 SRM)         9.1 %
2.25 oz      Goldings, East Kent [6.30 %] - Boil 60.0 47.6 IBU
0.25 tsp     Irish Moss (Boil 10.0 mins)              -
1.0 pkg      Irish Ale (Wyeast Labs #1084)            -

Mash Schedule: BIAB, 150F
Total Grain Weight: 11 lbs
Estimated Cost: $22.09

Saturday, February 1, 2014

New Kegerator


Isn't she beautiful?  Love hits you when you least expect it: we don't really have room in the apartment, but I saw a great deal on craigslist while looking for a car so I had to jump on it anyway.  For only $400 I got the two tap kegerator along with all the fittings, regulator, two kegs, two CO2 tanks, and a wheeled cooler modified for use as a mobile kegerator.  This means I won't have to bottle most of my beers, so it cuts the work required for a batch of beer almost in half.  While this means I'll have fewer things to ship across country to Pomona folks, it means I can now do growler fills for you locals.  Don't be shy to ask, I'm happy to share!
Related Posts Plugin for WordPress, Blogger...